Okta
Hideez Identity Cloud - Configuration SAML 2.0 for Okta
Configuring Okta
1. Sign in to Okta Admin Console
Log in to your Okta Admin Console.
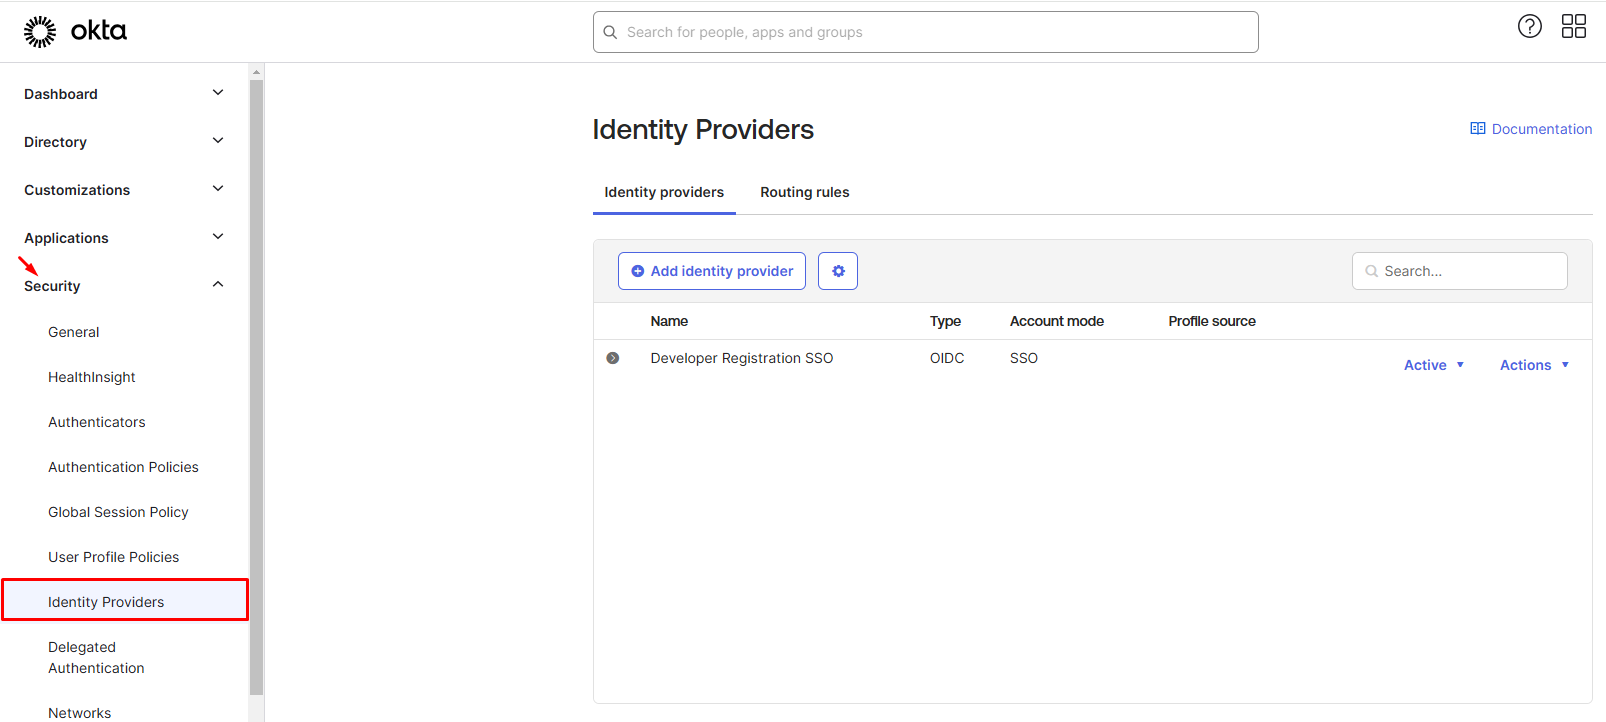
2. Navigate to Identity Providers
In the left navigation panel, go to Security → Identity Providers.

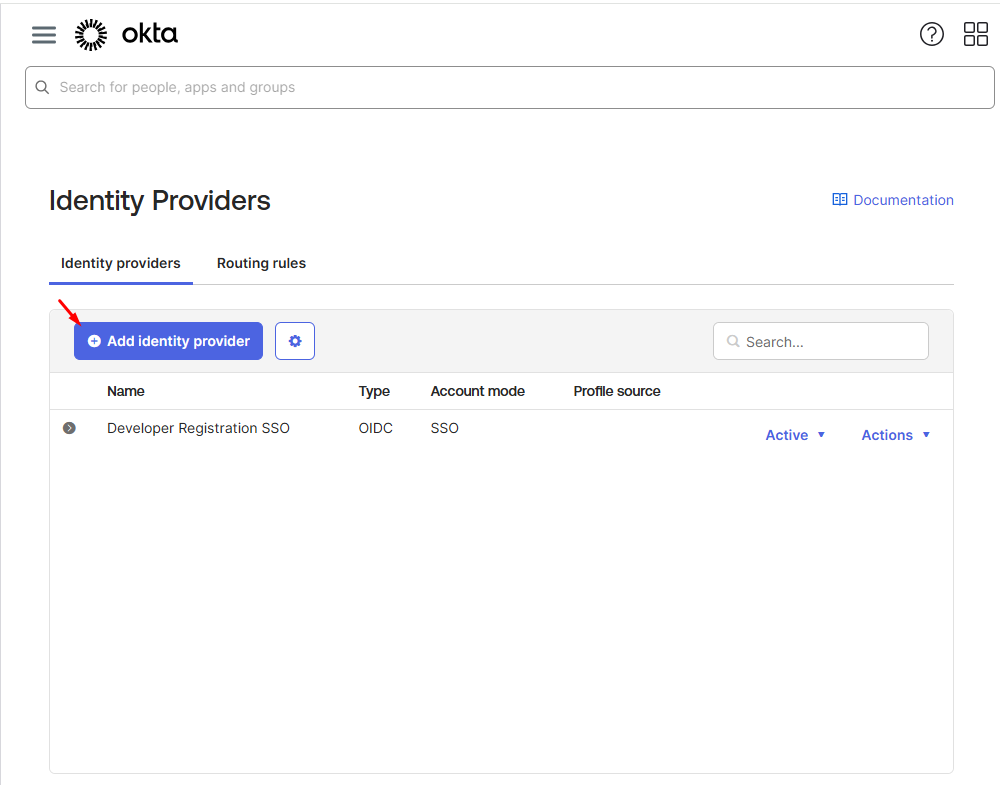
3. Add an Identity Provider
Open the Identity Providers tab.
Click Add Identity Provider.

Ensure the Select an Identity Provider list includes "SAML 2.0 IdP".

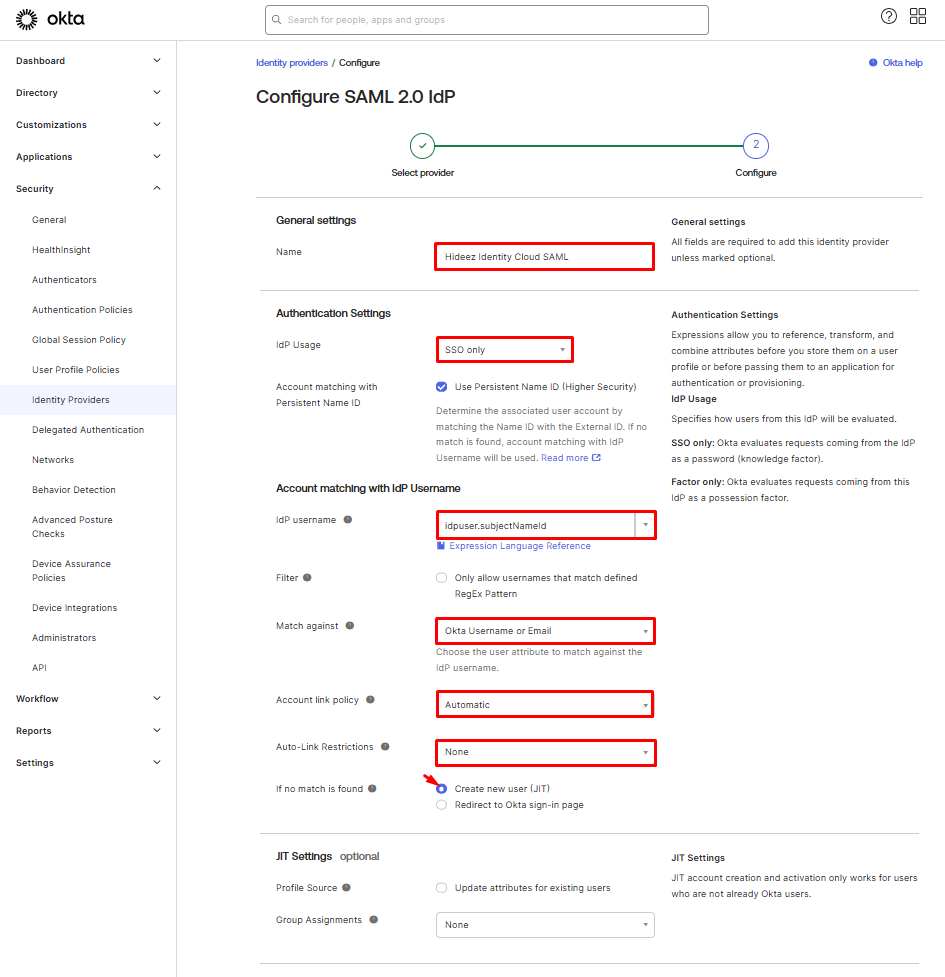
4. Configure SAML 2.0 IdP
Enter the required parameters to connect the IdP using SAML 2.0.

Setting Up Hideez Cloud
Sign in to Hideez Cloud
Log in to your tenant in Hideez Cloud.
Navigate to SAML Integrations
In the left navigation menu, go to Integrations → SAML.
Create a New SAML Integration
Click the Create App Integration button.
Configure SAML SP
Enter the necessary Service Provider (SP) configuration details.
Name: Okta
Issuer / SP Entity ID:
https://www.okta.com/saml2/service-provider/
+id from OktaAssertion Consumer Service (ACS) URL: Your tenant’s address (e.g.,
https://dev-48458662.okta.com/sso/saml2/
+id from Okta)Click Create.

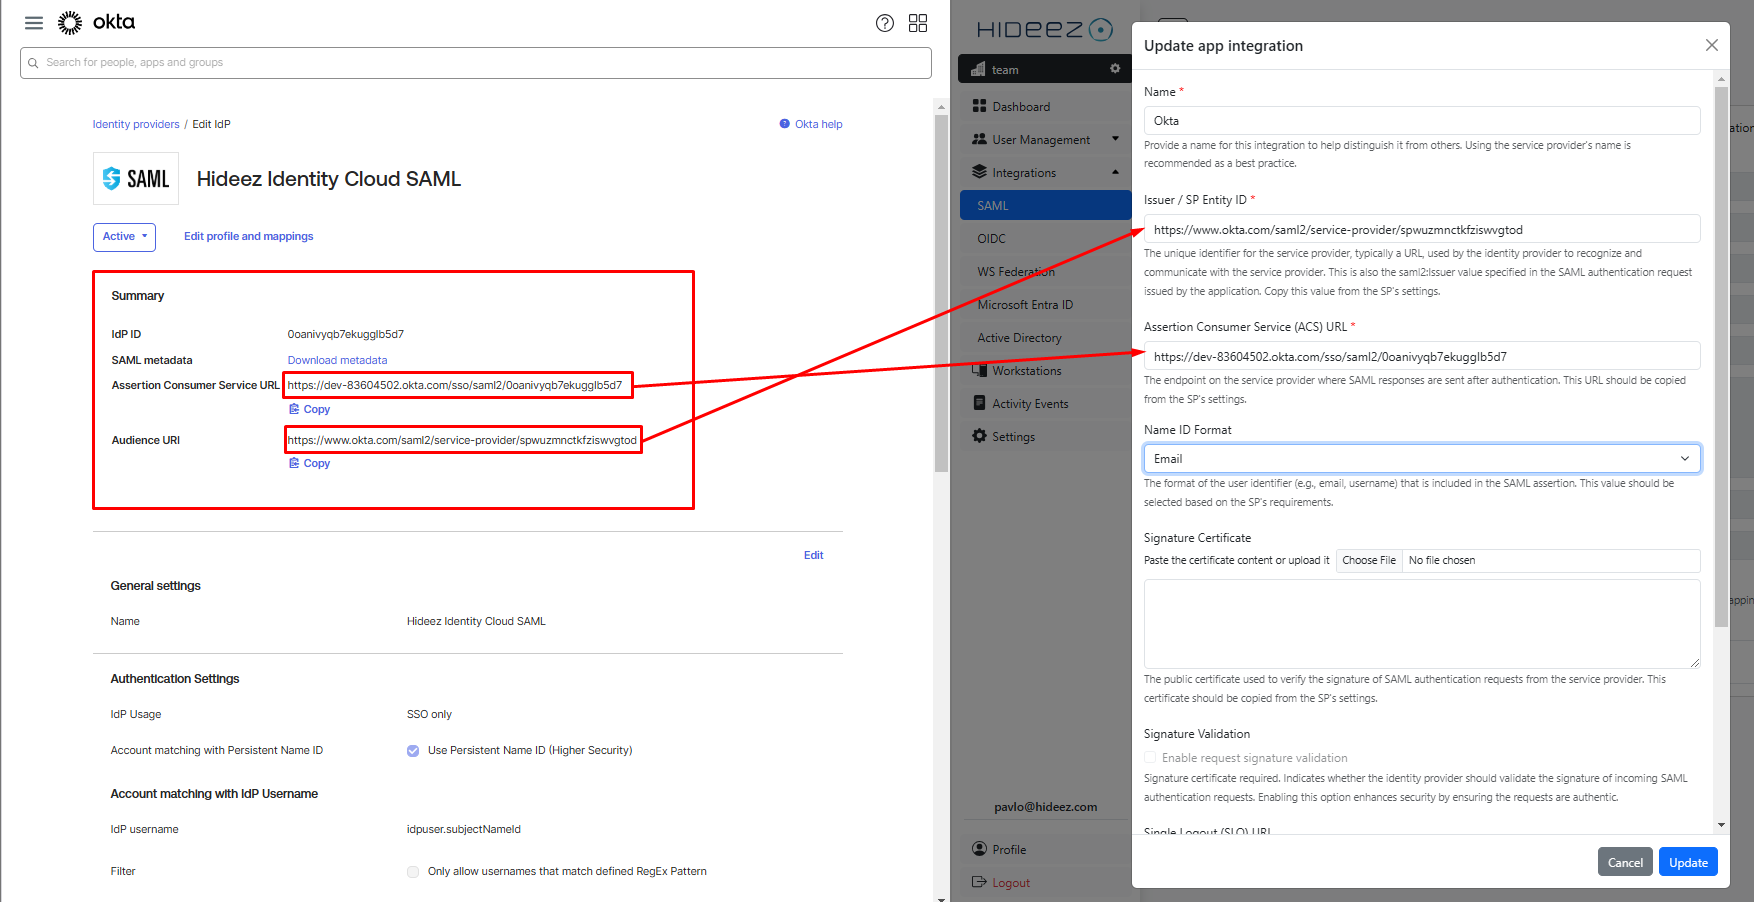
6. Finish SAML Setup on Okta

Click Finish
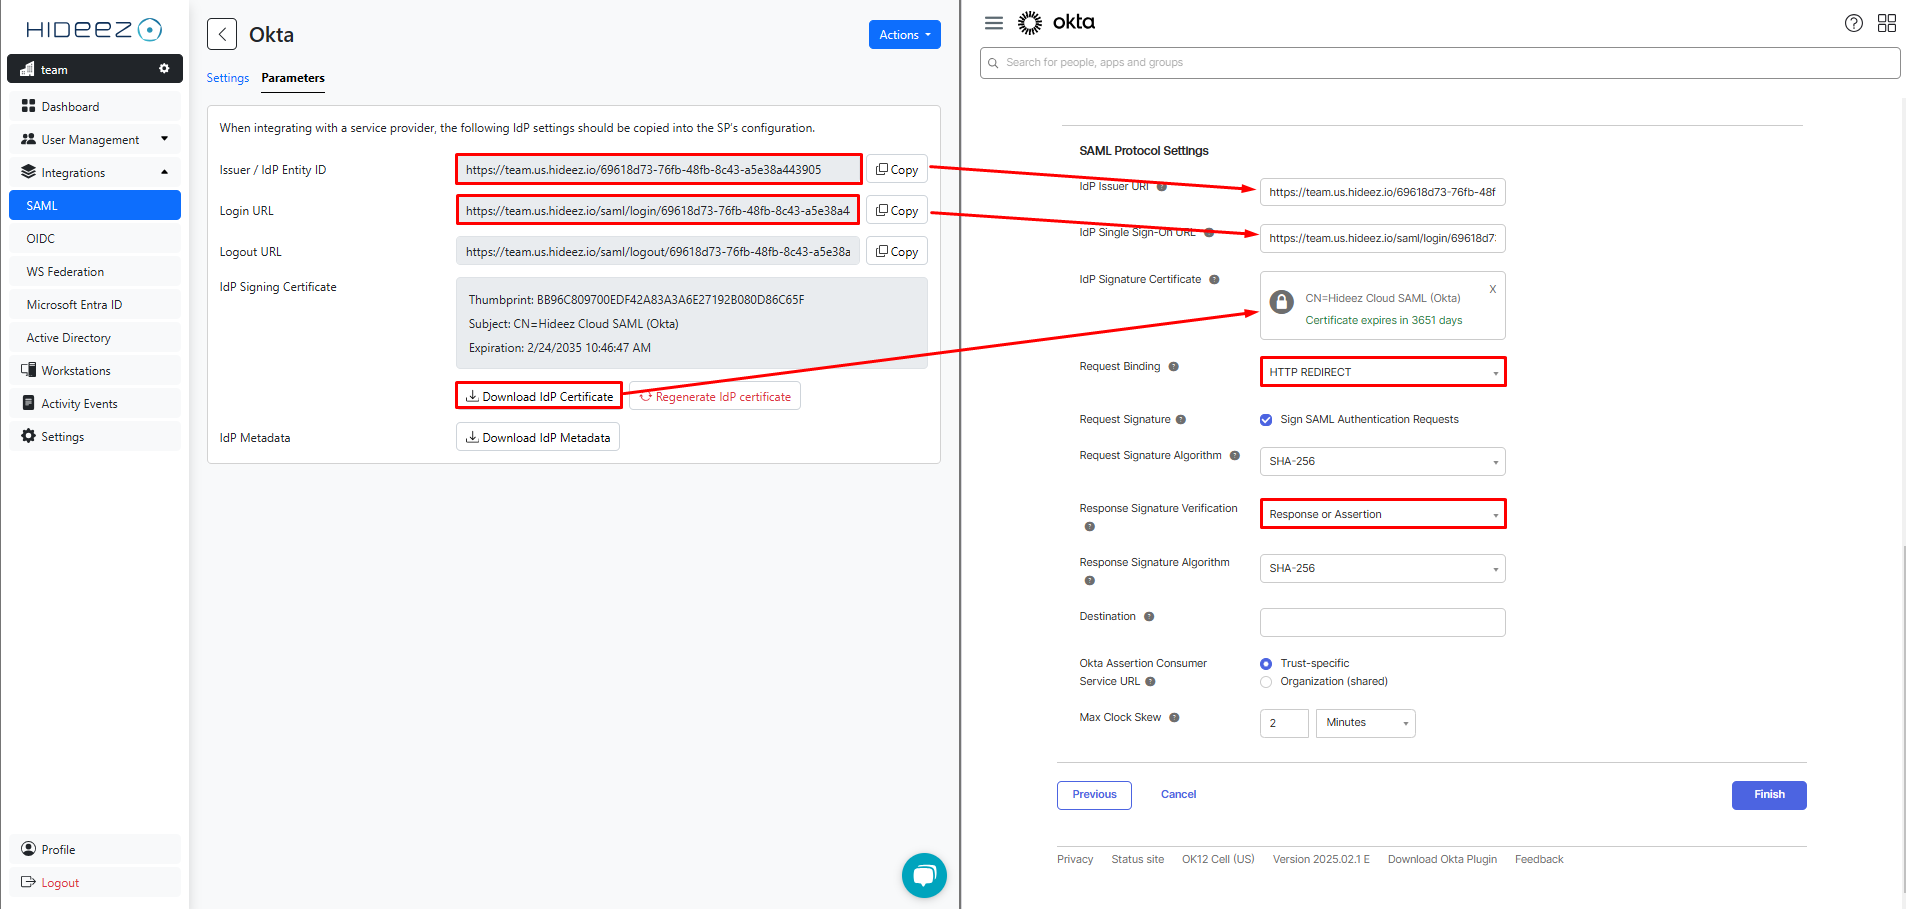
7. Edit the Service Provider (SP) Configuration
Return to Step 4 and update the necessary SP parameters.

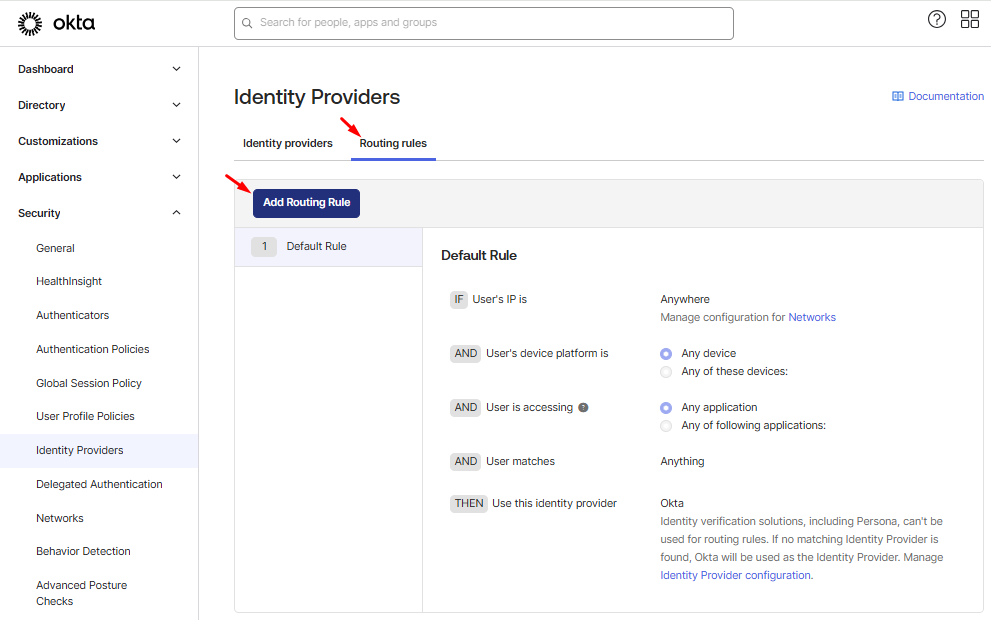
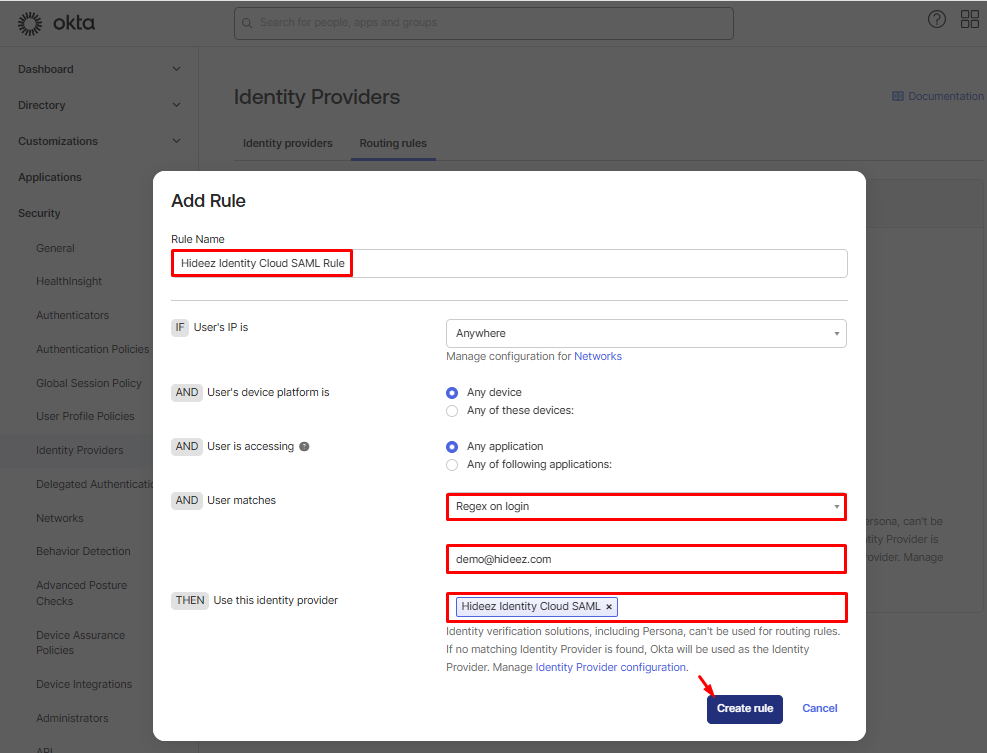
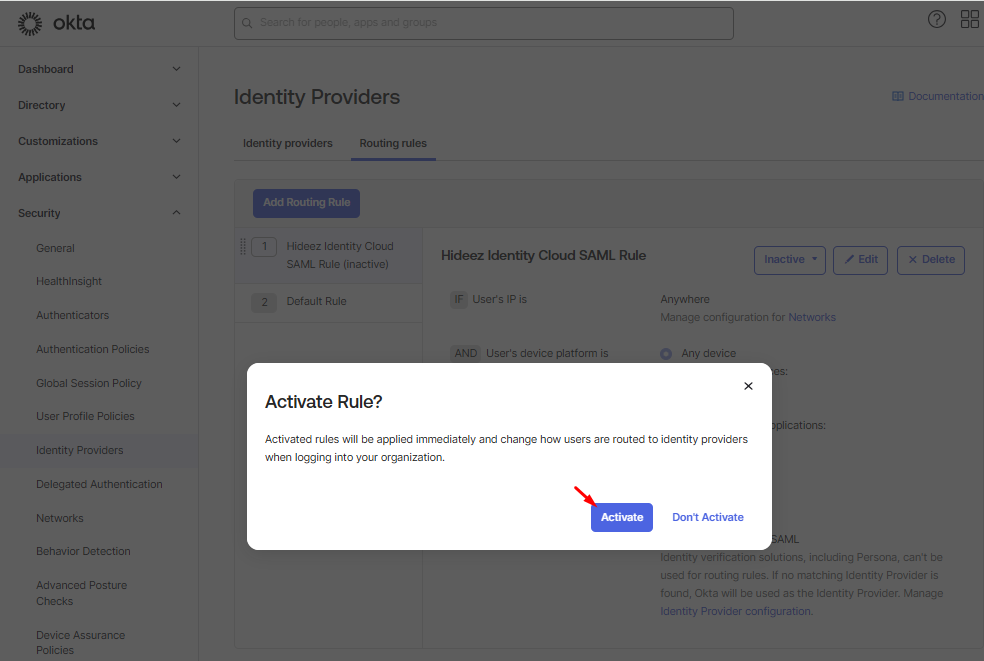
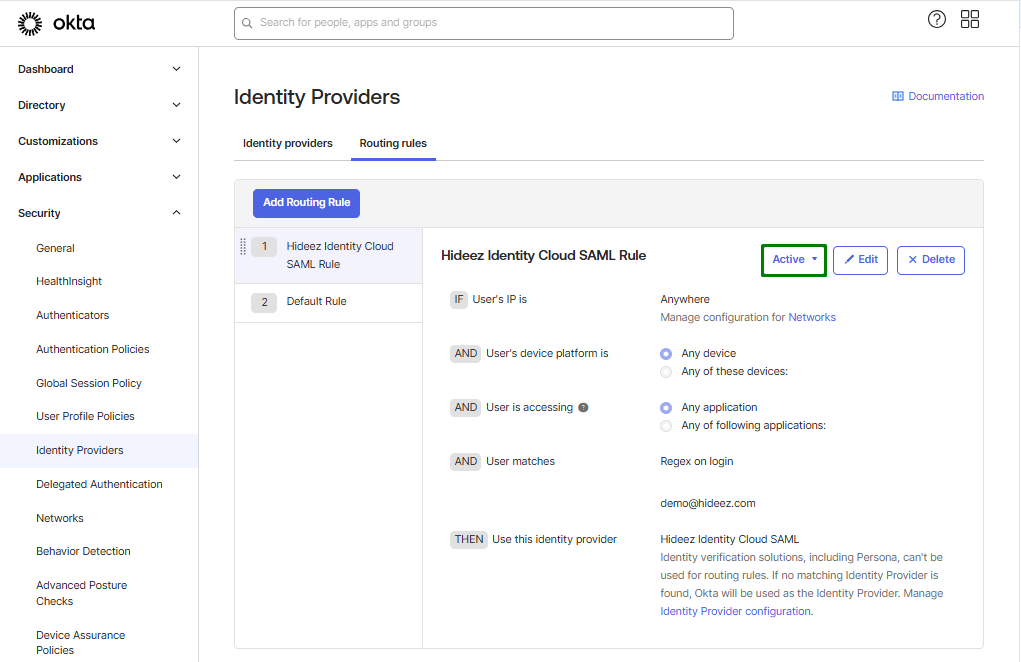
Set Up Routing Rules
Navigate to the Routing Rules tab.
Click Add Rule.

Define the necessary conditions and create Rule.

Activate the rule.


Note: Next time you sign in to Okta, you will be automatically redirected to Hideez Identity Cloud as the Identity Provider (IDP). After successfully signing in to Hideez Identity Cloud, you will be redirected back to Okta, completing the authentication process.
Last updated